RoomTune Monitor Correction
RoomTune measures the in-room response of the connected speakers and creates a correction profile for either the iD4+ Main or ALT monitor output. RoomTune guides you through measurement and profile creation.
RoomTune measures and corrects stereo speaker playback using the interface's onboard DSP. The correction applies to audio from any application sent to the corrected speaker outputs, without requiring a DAW plug-in.
RoomTune uses the RM1 measurement microphone supplied with iD4+. Each RM1 has its own factory calibration curve; the microphone's serial number identifies the correct calibration data for measurement.
Starting RoomTune
Open the Monitor Reference Window in iD Control and select MAIN or ALT for the speaker pair you want to measure. In Monitor Profiles, select the add monitor profile button and choose RoomTune. RoomTune detects the connected iD4+. Confirm the iD4+ serial number, then check the RM1 microphone serial number automatically retrieved for the device before continuing to the guided setup.
If RM1 serial-number verification fails
If RoomTune cannot verify the RM1 microphone's serial number, check the number and follow the on-screen options to retry or enter it manually. After three unsuccessful attempts, RoomTune displays a Problem Detected message and offers to continue using a standard microphone response curve instead of the RM1's individual factory calibration. Measurements made with the standard curve may be slightly less precise.
Select Confirm to continue with the guided setup, or Contact Support for assistance. Further retries are unavailable after three unsuccessful attempts.
First-time users are taken through a mandatory speaker-setup guide before measuring. Position the speakers and listening position in an equilateral triangle, angle the speakers towards the listener and align their height with ear level. Aim for at least 20–30 cm clearance from the front wall where possible, then complete the final room check. Returning users can revisit this guidance when creating another profile.
RM1 and I/O setup
- Connect the RM1 measurement microphone to Input 1, 2, 3 or 4. Select the input in RoomTune and enable +48 V phantom power. RoomTune checks the selected input for phantom power and a valid microphone signal before continuing.
- RoomTune tests the selected Main or ALT speaker output, including the left and right speakers, then asks you to enter the speaker-to-listening-position distance in centimetres or inches. Entering the speaker-to-listening-position distance is required before continuing. If RoomTune warns that the speakers are too close together for a reliable measurement, adjust their positions and repeat the setup check.
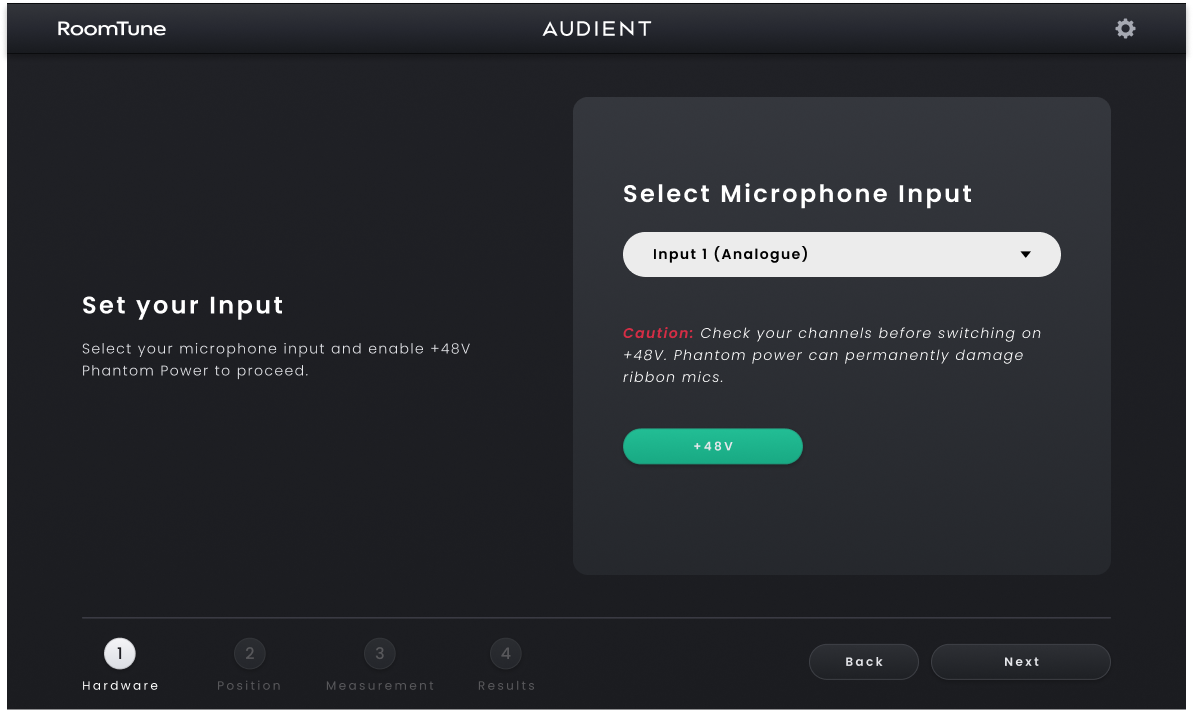
Automatic level setup
Place the RM1 at ear level in the listening position, centred where your head would normally be while mixing. A microphone stand is recommended.
Before continuing, remove any background noise that could affect the calibration. Once the RM1 is in position, step back and stay still, away from the monitors and microphone.
RoomTune then sets the measurement levels automatically. A white-noise signal gradually rises to 75 dB SPL while the microphone input gain is adjusted to the required level. Do not adjust the hardware controls during this process; RoomTune warns before the automatic level-setting begins because the monitor level will increase.
Beginner and Advanced workflows
The first RoomTune measurement uses Beginner Mode. Beginner Mode includes the guided position and measurement tutorial. After a profile has been created, returning users can choose Beginner Mode again or select Advanced Mode to skip the tutorial and move directly into the measurement process after setup.
Measuring the room
A complete RoomTune measurement uses 26 measurement positions around the listening position. First-time users and users in Beginner Mode complete a three-position tutorial covering the listening position, a point in front of it and a point behind it; these first three positions count toward the 26 measurements.
During measurement, follow the Spotlight direction and Radar to move the RM1 towards the next target. The Room View shows completed and upcoming measurement positions. When the microphone reaches the required position, hold it still while RoomTune plays the measurement sweep and captures the response. Measurements can be paused and resumed if required.
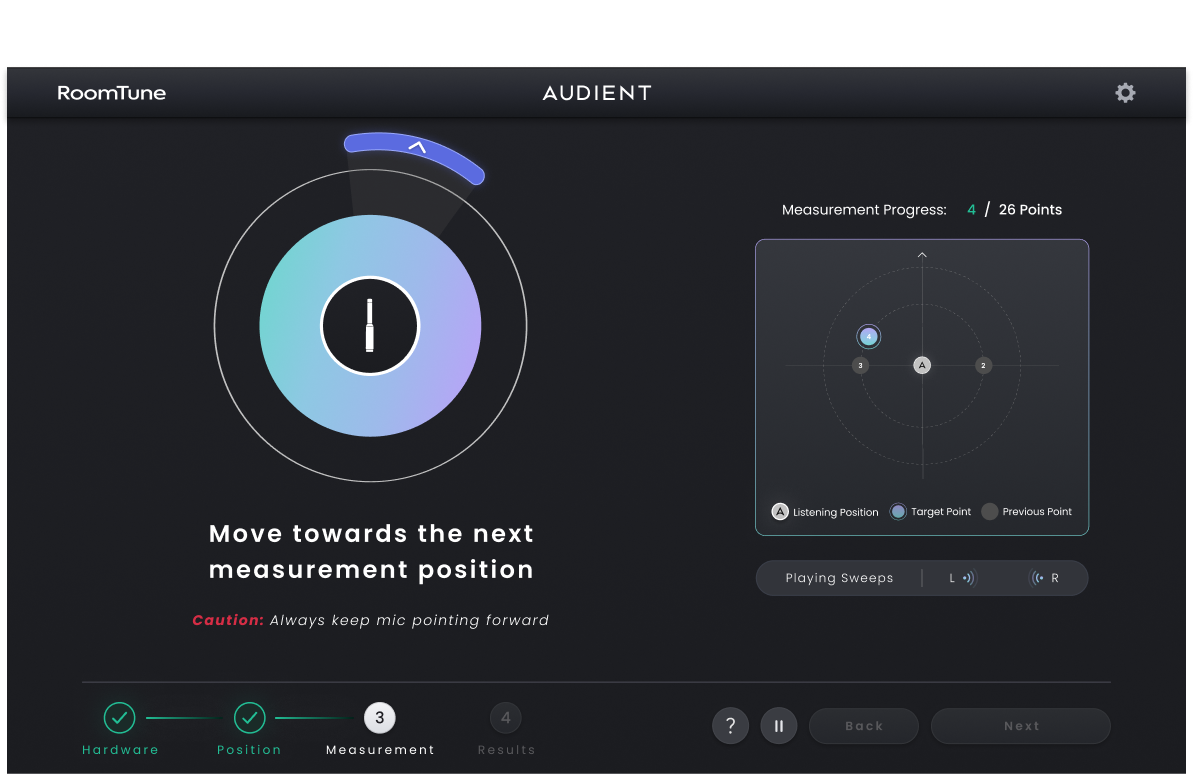
When RoomTune reports a problem
If the first measurement, taken at the listening position, is off-centre, RoomTune displays the measured offset and warns that continuing may reduce accuracy. Select Retry to reposition the RM1 microphone and repeat the measurement, or select Continue to proceed with the existing result.
If a measurement fails, follow the cause shown on screen: for no microphone signal, check the XLR cable and +48 V; for no speaker output, check speaker power and cables; for background noise, quieten the room and check the microphone connection. Select Retry after correcting the issue, Tutorial to review the measurement instructions, or Contact Support for further assistance.
Reviewing results and exporting
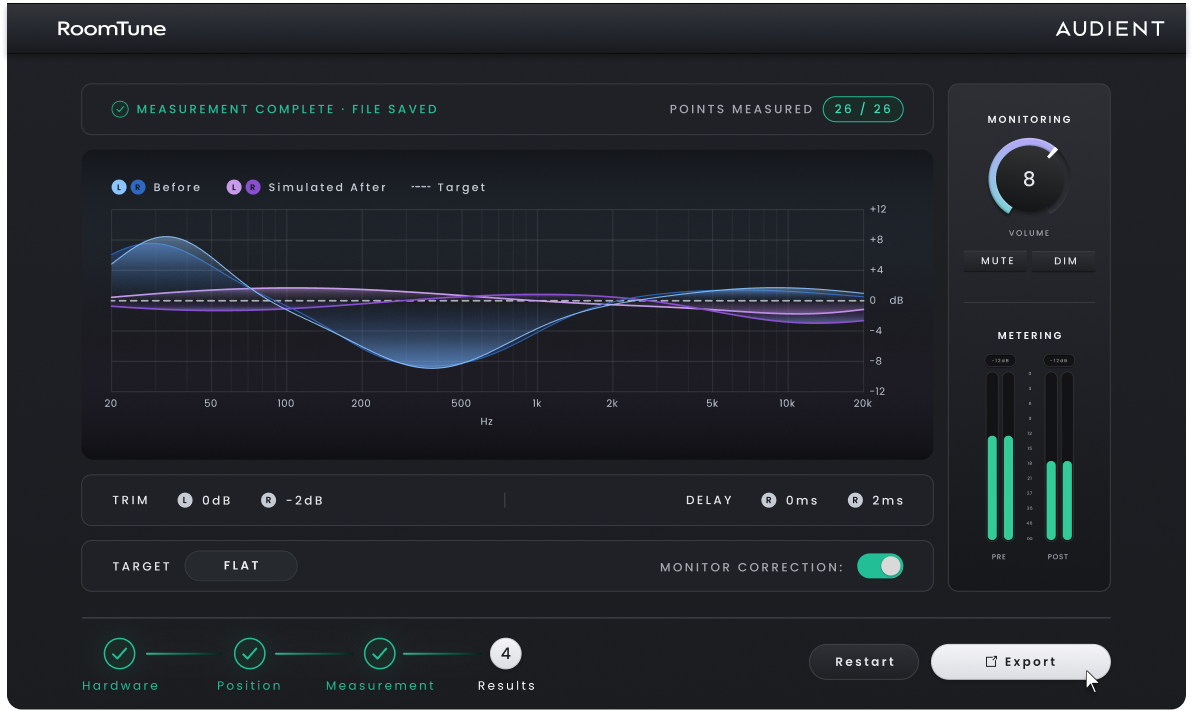
The Results screen appears after all 26 measurement positions have been completed. It displays the measured room response, the simulated corrected response and the Flat target curve used for correction. RoomTune also shows any level Trim and delay applied to the speakers. RoomTune calculates the measured and estimated corrected responses before Export becomes available. The Results monitoring area includes Pre and Post meters, showing the signal before and after monitor correction. Use Restart if you want to repeat the measurement process.
Select Export to save the correction to the connected iD4+. Enter a name for the Monitor Correction Profile and save it. The new profile is added to the Monitor Correction list, becomes the active profile and Monitor Correction is enabled by default. iD4+ can store up to 32 Monitor Correction Profiles.
Using a correction profile
Use the Monitor Correction controls in iD Control to turn RoomTune Monitor Correction on or off. To recall a saved profile, select it from the Monitor Profiles list for the required Main or ALT speaker output.
RoomTune and Manual Correction profiles can be enabled or bypassed from either the Monitor Side panel in the iD Mixer or the Monitor Reference window. Use the on/off control in either location.
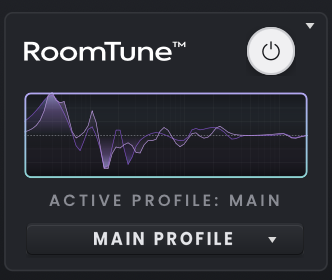
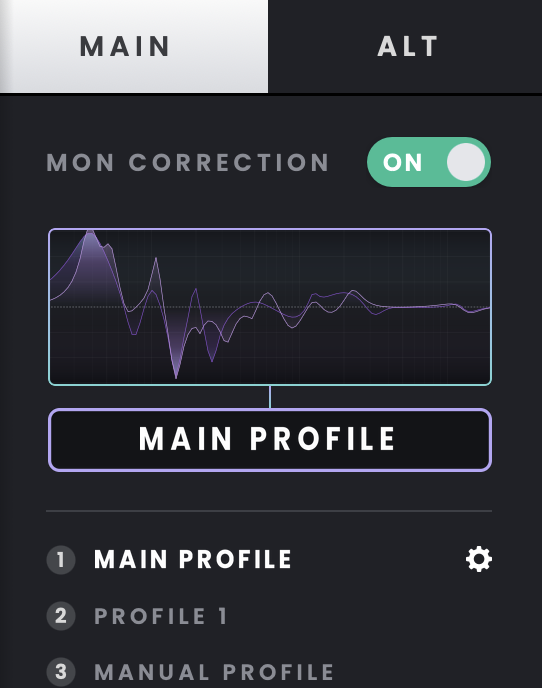
Bypassing a Monitor Correction Profile disables its filtering and trim settings.
Hardware behaviour during RoomTune
From opening RoomTune through to the Results screen, the connected iD4+ hardware controls are locked to prevent accidental changes that could affect the measurement. Global Mute remains available. Activating Global Mute pauses the process and displays an output-muted warning. If this happens during automatic level setup, the adjusted levels are reverted and setup must be repeated. During measurement, follow the on-screen options to resume or restart.
The Control Wheel LED ring shows RoomTune status: it fills during initialisation, slowly pulses during automatic setup and measurement, and uses repeated rapid flashes when RoomTune displays an error state.