Getting Started
In the Box
- iD4+ audio interface
- 1 m USB-C to USB-C cable
- RM1 measurement microphone and clip
System Requirements
Supported operating systems: macOS 12 or later; Windows 10 or later. Connect via USB using the supplied USB-C cable. The Audient Control Software Installer is provided through the Audient Resource Centre (ARC), as described below.
Installing iD Control
iD Control is provided as part of the Audient Control Software Installer. The latest software for iD4+ is available through the Audient Resource Centre (ARC).
- Visit https://arc.audient.com and sign in to your ARC account. If you are new to ARC, create an account first.
- Register your iD4+ in ARC if you have not already done so. Follow the on-screen registration instructions.
- Open the registered product in your ARC account and download the Audient Control Software Installer for your operating system.
- Save your work and close any open DAWs or other audio applications before starting installation.
- Open the downloaded installer and follow the on-screen instructions to complete installation.
- Connect and power on iD4+ as explained in the next section, then open iD Control and check that the interface is recognised.
If you have trouble registering the product or installing the software, visit the Audient Help Desk at https://support.audient.com.
Powering iD4+
Connect iD4+ to your computer using the USB-C port labelled COMPUTER. To bus-power the interface, use a USB-C to USB-C cable connected directly to a computer USB-C port capable of providing 5 V / 3 A (15 W). If the computer cannot supply this power, use the ALT POWER connection as described under Connections.
When iD4+ powers on, the LED ring around the Control Wheel pulses twice while the interface initialises.
To switch off iD4+, turn off connected powered speakers first, then disconnect the USB cable supplying power. If ALT POWER is connected, disconnect that power source too: unplugging the COMPUTER connection alone does not remove power.
To restart iD4+, switch off connected powered speakers and disconnect all active USB power connections, including ALT POWER if connected. Reconnect power and the COMPUTER connection, then switch on the speakers last.
Choosing the right audio cables
A cable's connector does not always tell you which signal it carries. An XLR cable is commonly used for microphones, a TS jack cable for guitars and basses, and a TRS jack cable for balanced mono line connections or stereo headphones. Balanced connections help reject interference when both devices support them, especially over longer cable runs. Choose the cable that matches the type of input and output, not just the size of the plug.
Microphones: Connect XLR microphone cables to the rear Mic/Line inputs, 1–4. Enable +48 V phantom power only on inputs whose microphones require it.
Guitars and basses: Connect a 6.35 mm TS instrument cable to either front JFET input. The JFET sockets take the place of rear Mic/Line Inputs 1 and 2 respectively when connected; Mic/Line Inputs 3 and 4 remain independent.
Keyboards and other line-level sources: Use 6.35 mm TRS cables from balanced outputs to rear Mic/Line combi-jacks. If the source has unbalanced outputs, use the appropriate compatible cables.
Powered studio monitors: Connect the left and right main speakers to Main Outputs 1 and 2 using balanced TRS cables or TRS-to-XLR cables as needed. ALT Outputs 3 and 4 can feed another pair. Passive speakers require an amplifier.
Headphones: Connect stereo headphones to HP1 or HP2 using the appropriate headphone sockets. Unlike a shared pair of sockets, HP1 and HP2 have independent output levels and can receive different selected mixes.
External processors: Connect INSERT SEND on Input 1 or 2 to the external processor input and its output to the matching INSERT RETURN. The Send and Return use separate sockets.
Digital expansion: Use TOSLINK optical cables for ADAT or optical S/PDIF equipment. There are two optical input ports and two optical output ports. The BNC word-clock connector is output-only.
Connecting and Powering Studio Monitors
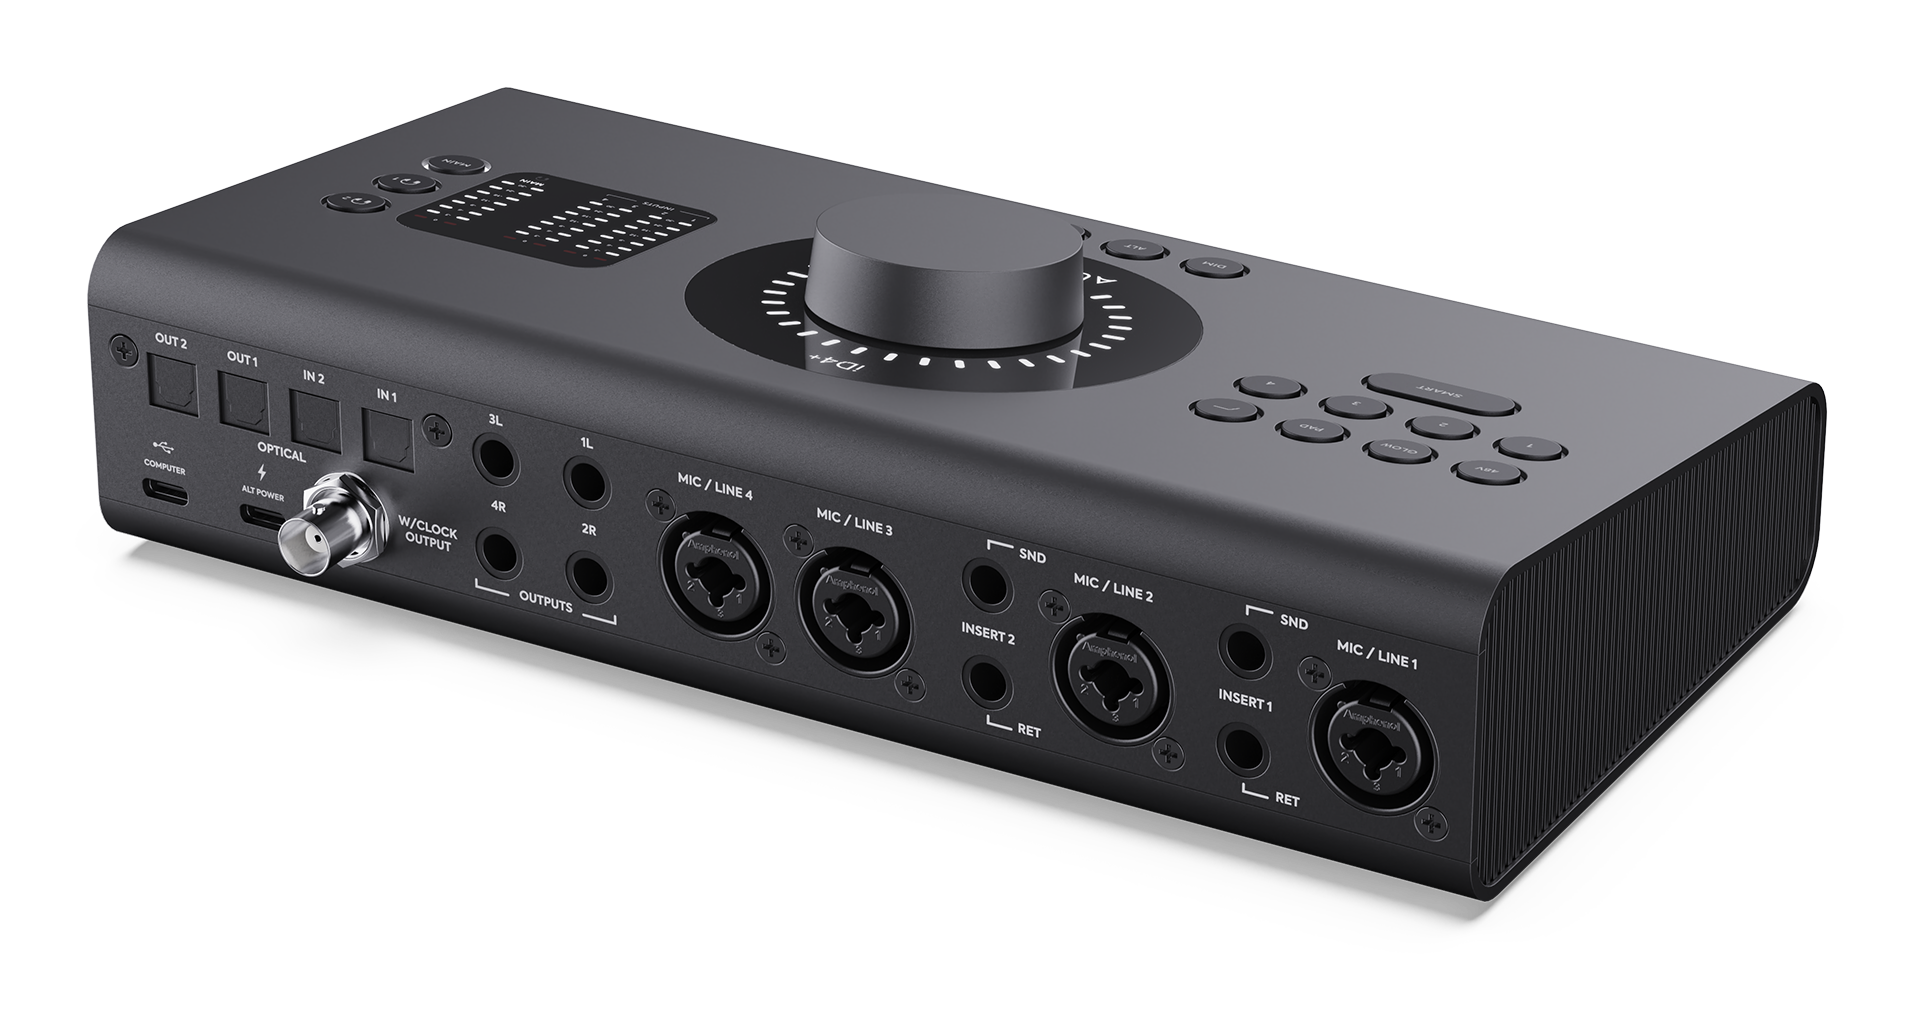
Before connecting or disconnecting powered monitors, switch the speakers off and power off iD4+. Connect the Main monitor outputs to your speakers using suitable audio cables. A second pair can be connected to the ALT outputs. Once all connections are secure, power on iD4+ and then switch on the speakers last.
Powering On
- Turn on the computer and power on iD4+.
- Switch on the powered monitors last.
- Start with the monitor output level turned down, then raise it gradually to a comfortable listening level.
Powering Off
- Turn down the monitor output level.
- Switch off the powered monitors first.
- Disconnect iD4+ from its active USB power supply, including ALT POWER if connected, then switch off the computer if required.
This order reduces the risk of audible pops or thumps from the speakers when equipment is switched on or off.
Recording Setup
Connect your headphones, or set up powered monitors using the instructions above. With iD Control installed and iD4+ connected to your computer, follow these steps to make a recording:
- Connect a microphone or line-level source to one of the four Mic/Line inputs. For guitar or bass, you can use either JFET instrument input; these take the place of Mic/Line Inputs 1 and 2 respectively when connected.
- If your microphone requires +48 V phantom power, select that Mic/Line input and enable +48 V.
- Perform at the loudest level you expect to record. Set Input Gain using the Control Wheel, or run Smartgain to set it automatically. Check the input meter in iD Control or on your DAW track to confirm the signal is present and is not clipping.
- In your DAW, choose iD4+ as the audio input and output device. Create a mono audio track, select the input connected to your source and route the track to the intended stereo playback output.
- Choose how to monitor using the guidance below. If monitoring through iD Control, bring up the input channel fader and check that the selected speaker or headphone output receives the intended mix. If monitoring through your DAW, use the track's input monitoring instead to avoid hearing the same input twice. Start with the listening level low and raise it gradually.
- Record-enable the mono track and make a short test recording. Stop, then play the recording back through your selected speakers or headphones. If you cannot hear it, check the DAW track's output routing, the playback channels in iD Control and the selected listening output before making a full take.
Choosing how to monitor
Monitoring through iD Control: The interface's low-latency monitoring path lets you hear a live microphone or instrument alongside computer playback without routing the input through the DAW first. Keep the DAW track armed for recording, but turn off that track's software input monitoring. The iD Control Mixer controls the listening balance; its channel faders do not change the input level recorded by the DAW.
Monitoring through the DAW: Choose this when you need to hear plug-ins running in your recording software while performing. Enable the track's input monitoring and use a buffer size that keeps the delay manageable without clicks or dropouts. Avoid monitoring the same live input through iD Control at the same time, as the two paths can produce a doubled, hollow or slightly delayed sound.
The following sections explain the iD Control Mixer, independent headphone mixes, Main and ALT monitoring, inserts, digital I/O, RoomTune and Loopback.