DAW Setup
Once iD4+ is connected and iD Control is installed, choose the interface as the audio input and output device in your recording software. Check that the signal reaches the intended input channel in iD Control before recording. The following sections cover the main DAW settings.
Pro Tools Setup
- Connect iD4+, launch Pro Tools and open Setup > Playback Engine. Select iD4+ as the playback engine.
- Create or open a session at the required sample rate.
- In Playback Engine, choose a hardware buffer size that suits your session. Smaller buffers reduce delay when monitoring through DAW plug-ins; larger buffers may improve stability in sessions with many tracks or plug-ins.
- Open Setup > I/O and review the Input, Output and Bus tabs. If a required hardware path is missing, use Default only where necessary, as it may change customised I/O assignments.
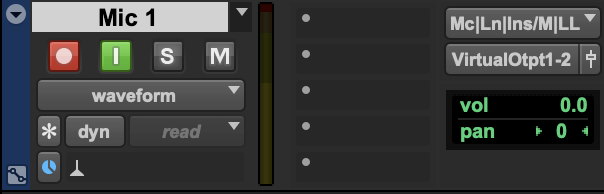
- Create a mono Audio track, choose the hardware input connected to your source and assign the track to the stereo playback output.
- Record-enable the track and confirm that the selected stereo playback path is routed to your speakers or headphones in iD Control.
Logic Pro Setup
- In Logic Pro, open Logic Pro > Settings > Audio > Devices and select iD4+ as both the Input Device and Output Device.
- Set the I/O Buffer Size for your monitoring method. Smaller buffers reduce latency when monitoring through Logic and its plug-ins, but use more computer processing power. If you hear pops or clicks, or see system overload messages, increase the buffer size.
- Set the project sample rate under File > Project Settings > Audio.
- Create a mono Audio track, choose the input connected to your source and route the track's stereo output to the playback channels used by your speakers or headphones in iD Control.
- If useful, open Mix > I/O Labels to give the available inputs and outputs clearer names.
- If you want to monitor a live input through the low-latency iD Control Mixer, turn off Software Monitoring under Logic Pro > Settings > Audio > General. This prevents a second, slightly delayed signal from Logic. Keep the track record-enabled so the input can still be recorded.
- If you instead need to hear Logic's plug-ins while performing, monitor through Logic and use an appropriately low, stable buffer size.
Cubase / Nuendo Setup
- Open Studio > Studio Setup > Audio System in Cubase or Nuendo and select the driver for iD4+. On Windows, choose the Audient ASIO driver; on macOS, choose the corresponding Core Audio device.
- Confirm any prompt to change audio drivers. If you need to change the buffer size, use the selected driver's control panel where available.
- Open Studio > Audio Connections (F4). On the Inputs tab, add or check the mono input bus for your source and assign it to the correct iD4+ hardware input.
- On the Outputs tab, check that a stereo playback bus is assigned to the intended output channels.
- Create an Audio track, select the required input bus and enable recording. Check the sample rate under Project > Project Setup.
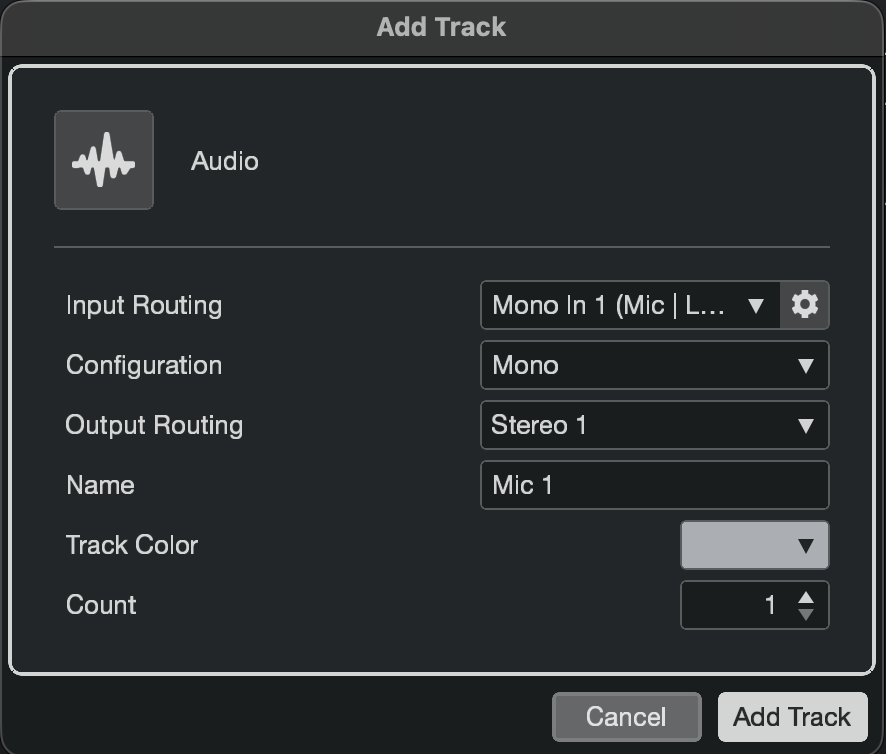
- Confirm that iD Control routes the playback bus to your monitor or headphone output. When monitoring directly through iD Control, avoid also monitoring the track through Cubase or Nuendo.
Ableton Live Setup
- Open Ableton Live's Settings/Preferences > Audio. Choose Core Audio on macOS or ASIO on Windows, then select iD4+ as the audio input and output device.
- Set the required sample rate and buffer size. Smaller buffers reduce monitoring latency; larger buffers may help with CPU load.
- Open Input Config and Output Config and enable the hardware channels you intend to use. Enabling only the required channels can simplify the I/O menus.
- Create an Audio track. In its I/O controls, choose Ext. In and select the mono input connected to your source.
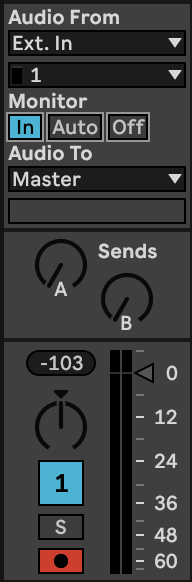
- Set the track's output to the main stereo playback path, arm the track and confirm that the input level is visible.
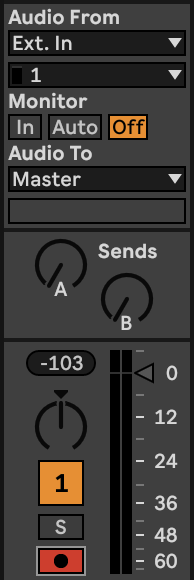
- When monitoring through iD Control, set the track's Monitor option to Off to avoid doubled or delayed sound. Use Auto or In only when you deliberately want to hear the input through Live and its effects.
Choosing Recording Inputs
The four analogue recording inputs are Inputs 1–4. The two JFET instrument sockets replace Mic/Line Inputs 1 and 2 respectively when connected. Optical input channels appear after the four analogue inputs and their availability depends on the digital format and sample rate.
For an analogue recording, choose the appropriate mono input from 1–4. A guitar or bass connected to either JFET socket uses Input 1 or 2 respectively. For example, to record a guitar and bass alongside two microphones, connect the instruments to JFET Inputs 1 and 2 and the microphones to rear Mic/Line Inputs 3 and 4. Create four mono tracks in the DAW, select the corresponding inputs and set each recording gain independently. The two instrument connections take over their corresponding rear inputs, but do not affect Inputs 3 and 4.
Input Gain sets the level recorded by the DAW. The fader, pan, mute and solo controls in iD Control adjust the monitor mix instead; moving a monitor fader does not change the input level reaching the DAW. If recording sounds correct but you cannot hear playback, check that the DAW's stereo output is routed to an active listening output in iD Control.
Recording With or Without iD Control Effects
Hear processing without recording it
Use this when you want to hear EQ or compression during a performance but retain an unprocessed recording for mixing. Enable the required processor on the Mic/Line channel in iD Control and leave Record FX switched off. The processed signal is heard through the monitoring path, while the DAW receives the original input. You can refine or replace the processing later without altering the recorded take.
Record processing into the take
To include EQ and compression in the recording, switch on Record FX for that channel before starting the take. The DAW records the processed input. Once recorded, that processing is part of the audio file and cannot be removed afterwards.
EQ, compressor and Comfort Reverb are available at supported DSP sample rates. At sample rates above 96 kHz these processors are unavailable, whether you are monitoring or recording. Check the sample rate before setting up a session that requires onboard processing.
Comfort Reverb is normally heard only while monitoring. To record a mix containing it, use Loopback.
