iD2+ Quick Start Guide
Welcome to your new Audient iD2+ Audio Interface
Please read this quick guide to help get you started. For more information on operating your iD2+, please download the full user manual from:
https://docs.audient.com/iD2plus/overview
You can also visit our Help Desk at https://support.audient.com for FAQ's and further guides on setting up your interface.
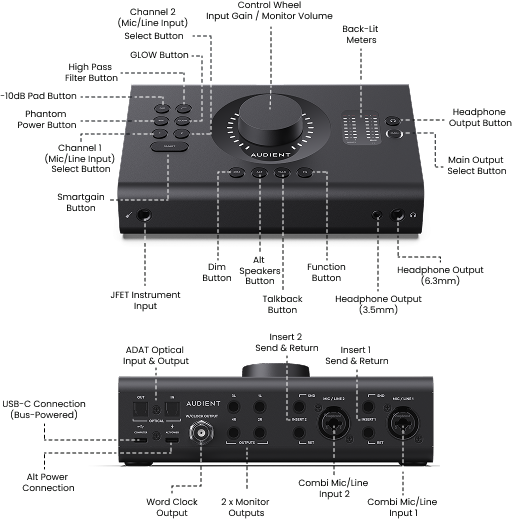
Front panel labels:
- Control Wheel – Input Gain / Monitor Volume
- Channel 2 (Mic/Line Input) Select Button
- GLOW Button
- High Pass Filter Button
- -10dB Pad Button
- Phantom Power Button
- Channel 1 (Mic/Line Input) Select Button
- Smartgain Button
- Back-Lit Meters
- Headphone Output Button
- Main Output Select Button
- Dim Button
- Alt Speakers Button
- Talkback Button
- Function Button
- JFET Instrument Input
- Headphone Output (3.5mm)
- Headphone Output (6.3mm)
Rear panel labels:
- ADAT Optical Input & Output
- Insert 2 Send & Return
- Insert 1 Send & Return
- USB-C Connection (Bus-Powered)
- Alt Power Connection
- Word Clock Output
- 2 x Monitor Outputs
- Combi Mic/Line Input 2
- Combi Mic/Line Input 1
Note: iD2+ is bus-powered over USB-C — no separate power supply is needed.
Driver Installation
macOS
- Head to arc.audient.com to reach the Audient Resource Center (ARC) and register your device — this unlocks the latest software, drivers, tutorials, and exclusive plugins, plus notifications when updates are released.
- Once registered, you can download the Audient Control Software installer, which includes iD Control for Mac, from the My Products page at any time.
- Open Audient Control Software Installer, select iD Control and continue through the install process.
- Connect iD2+ to your Mac using a USB-C cable, the unit is bus-powered, so no separate power supply is required.
- Run iD Control from your Applications folder. You may be asked to install a firmware update, follow the on-screen steps to do this.
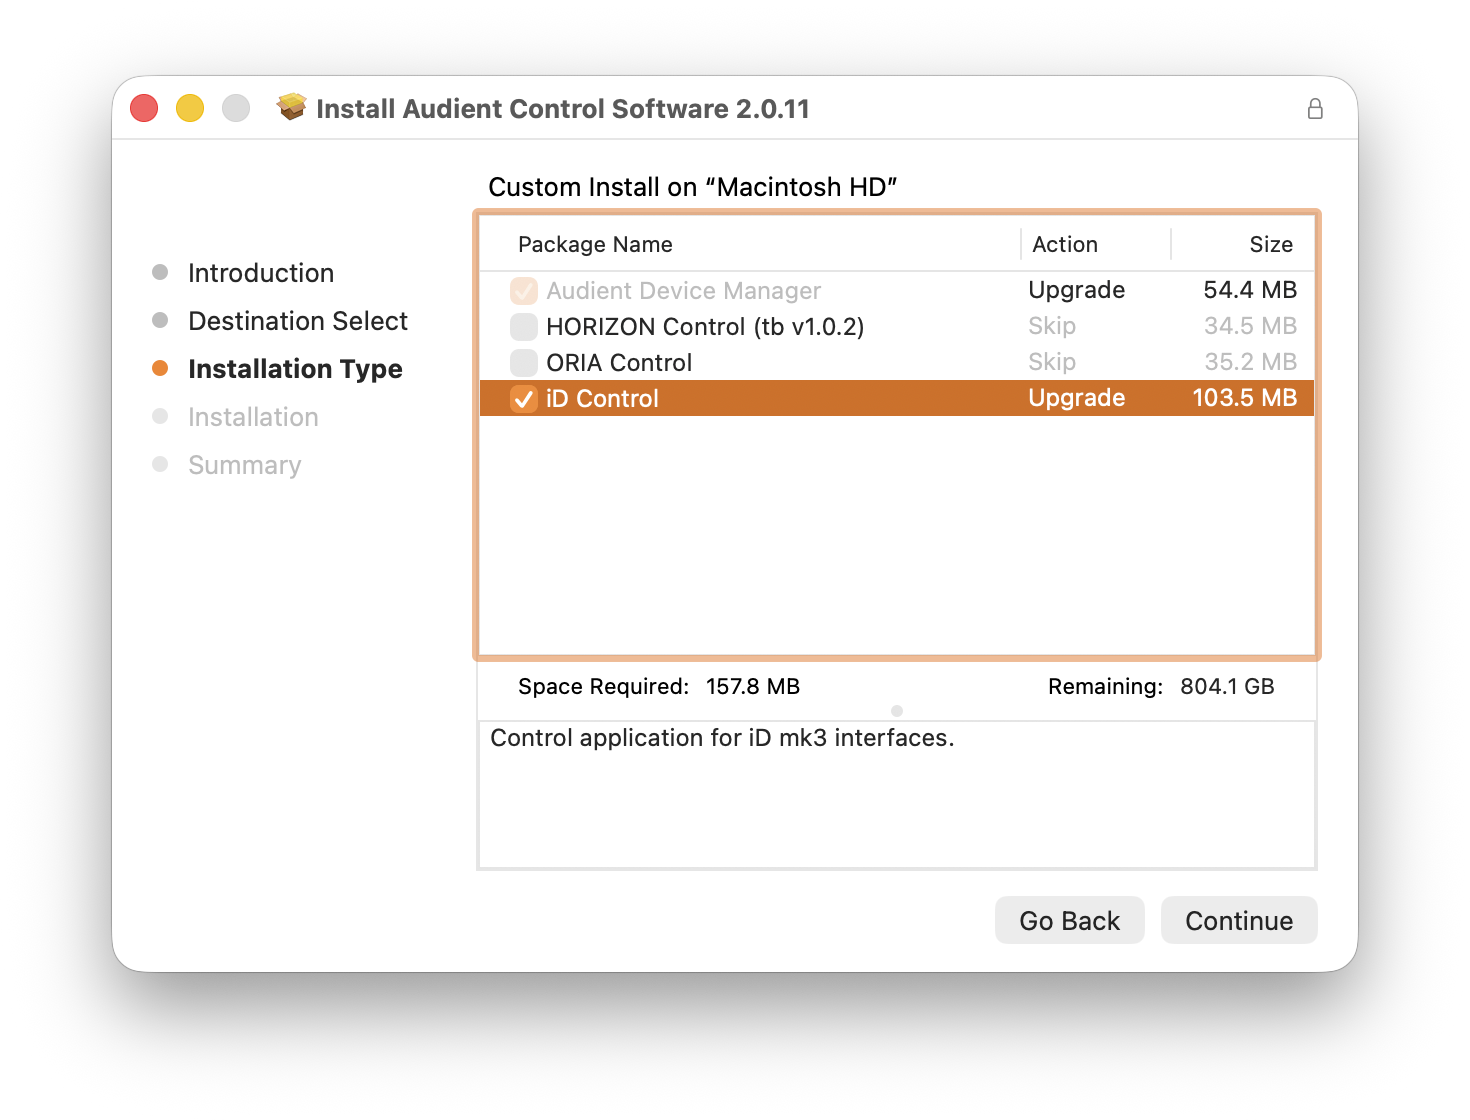
Once Installed, Open the iD Control application to access the Mixer, Monitoring Profiles & Settings.
System requirements:
- macOS 12 or Later
- Intel CPU or Apple Silicon
- 1GB RAM Minimum
Windows
- Head to arc.audient.com to reach the Audient Resource Center (ARC) and register your device — this unlocks the latest software, drivers, tutorials, and exclusive plugins, plus notifications when updates are released.
- Once registered, you can download the Audient Control Software installer, which includes iD Control for Windows, from the My Products page at any time.
- Open the downloaded file and install iD Control.
- Connect iD2+ to your Computer using a USB-C cable, the unit is bus-powered, so no separate power supply is required.
- Run iD Control from your Program Files folder. You may be asked to install a firmware update, follow the on-screen steps to do this.
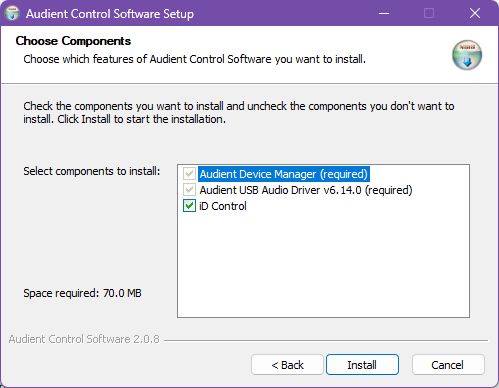
Once Installed, Open the iD Control application to access the Mixer, Monitoring Profiles & Settings
System requirements:
- Windows 10 or Later
- Intel Core 2 @ 1.6GHz, AMD equivalent, or ARM Processor
- 1GB RAM Minimum
Setting Up iD2+
Output Configuration
- Connect your studio monitors to the Stereo Monitor Outputs on the rear of iD2+. Caution: (we recommend you turn off your studio monitors when connecting them to your iD Device).
- Connect headphones to either the 6.3mm or 3.5mm headphone output on the front panel, both are available at once, so you and a collaborator can listen together without an adapter.
- Use the Control Wheel to control your output level for your monitor and headphone outputs.
- Raise the faders of the channels you wish to monitor in the iD Control app to monitor your input with near-zero latency.
- With iD2+ set as your computers sound device, play audio from your computer and confirm you see a signal on the meters and hear playback.
Please note, if the device’s LED Ring continuously flashes, your USB port may not be carrying enough power for the device. You can use a secondary USB power source via the ALT USB port on the back of your iD device to supply suitable power. Ensure the power source is 3A and is USB-C to USB C.
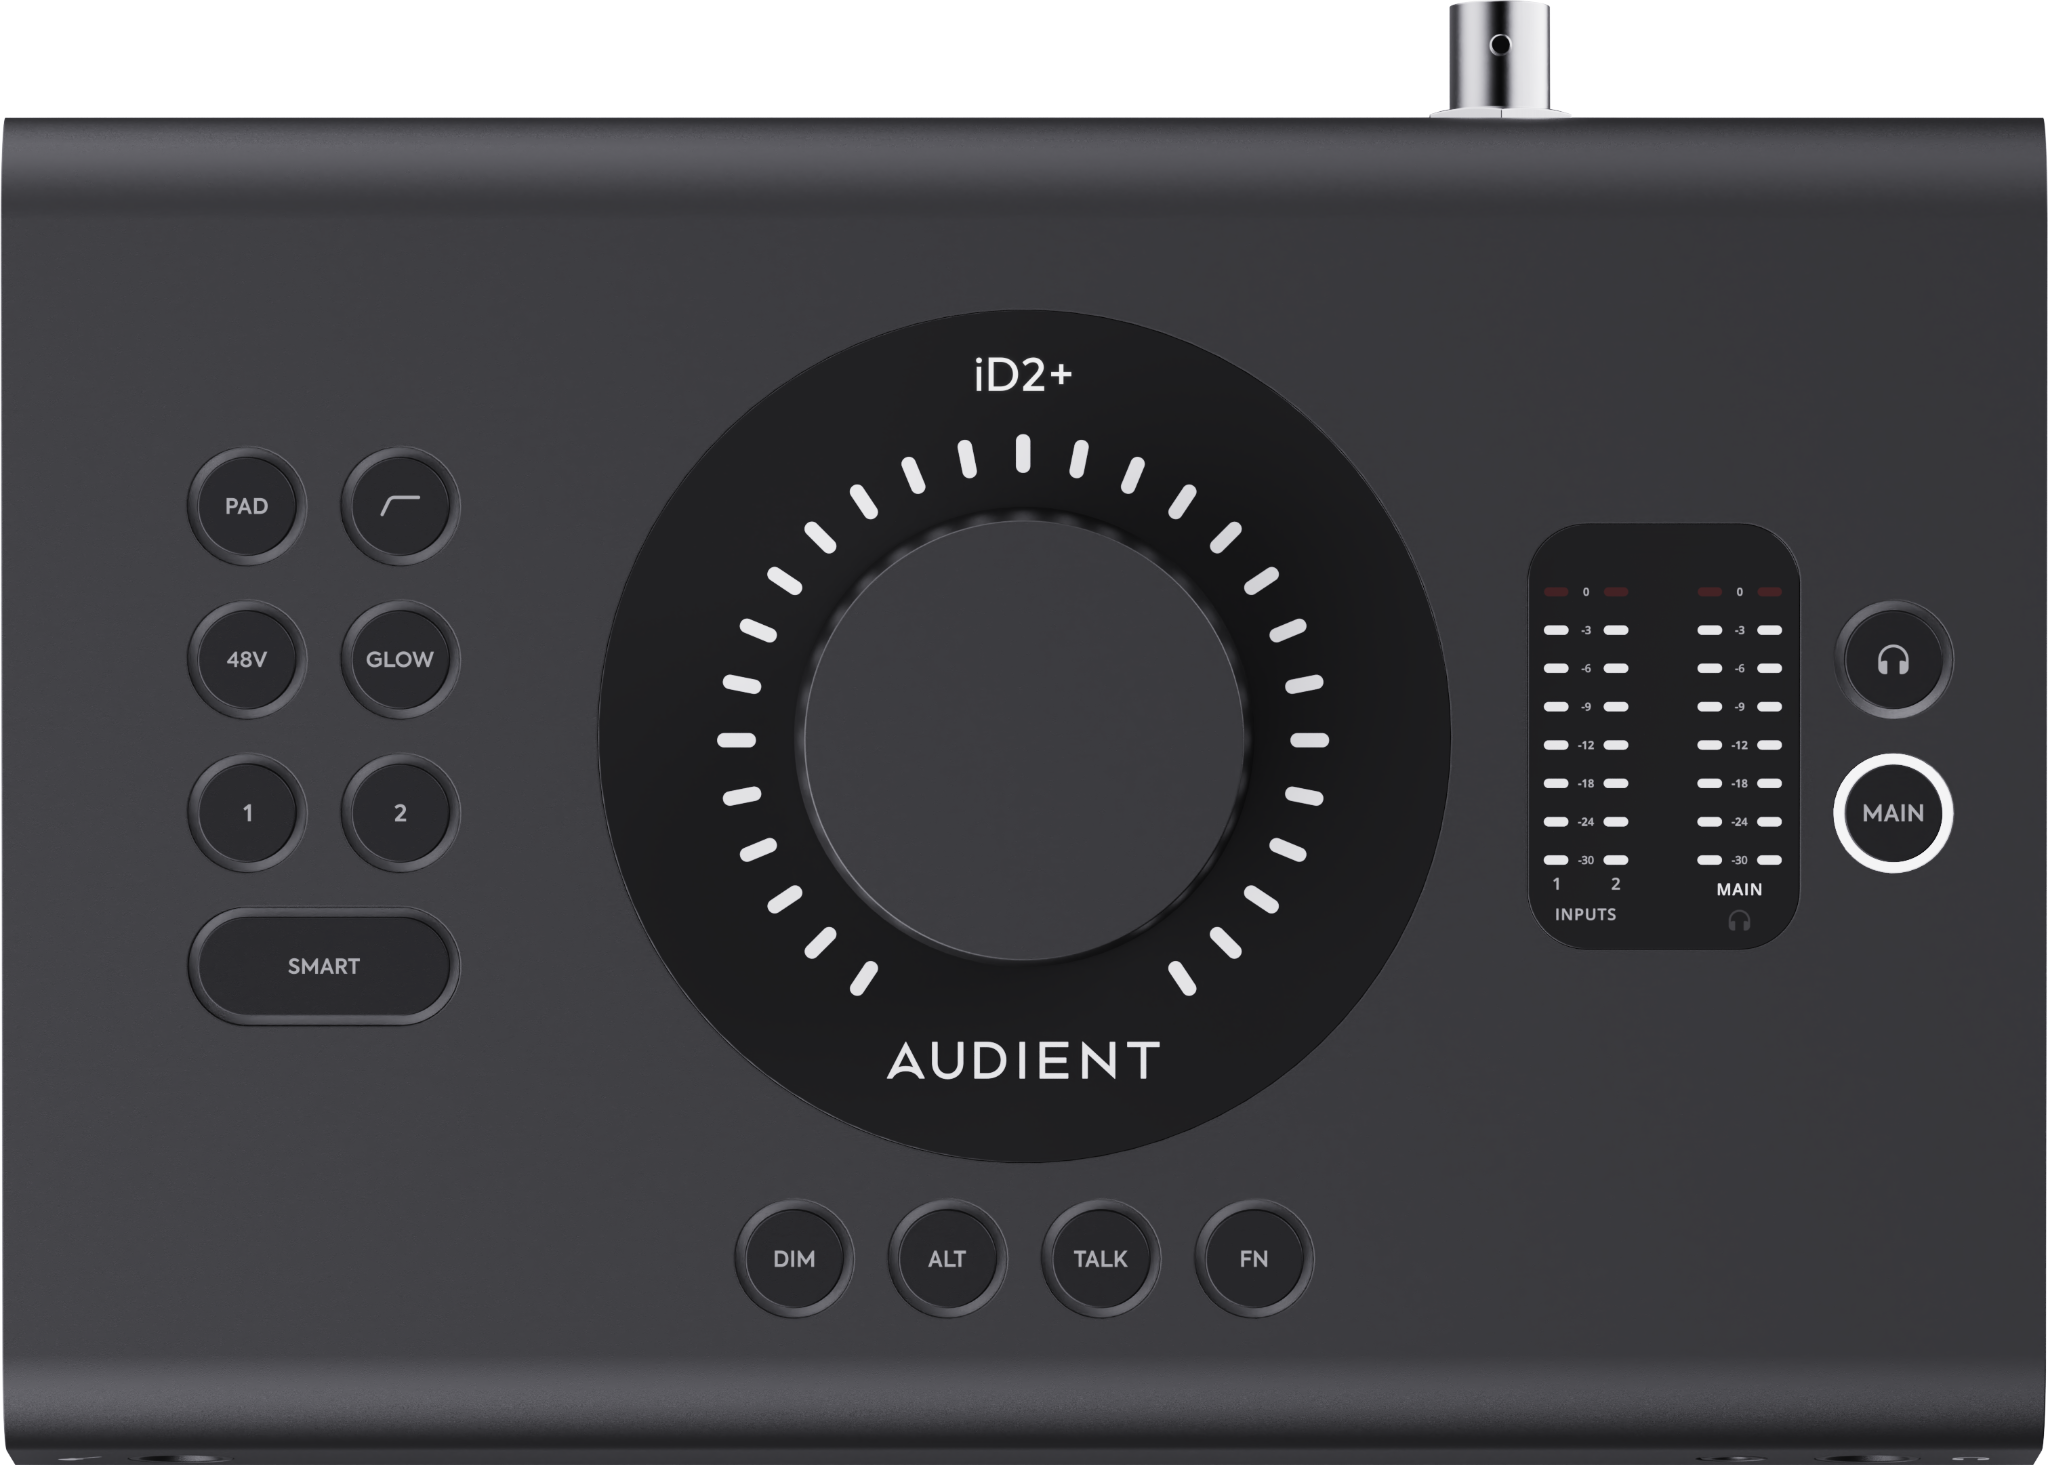
The Control Wheel is used to control the output level of the iD2+. Select Main or Headphone and rotate the Control Wheel to increase or decrease the output level.
DAW Setup
When using a DAW, set the software's audio system to use iD2+ — CoreAudio on macOS, or ASIO on Windows. Support videos for several popular DAWs are available on the Audient YouTube channel, otherwise consult your DAW's manual for setup instructions.
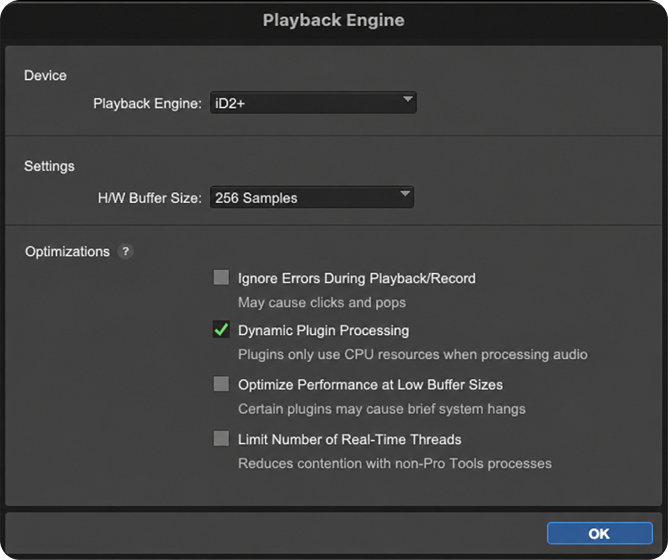
Once selected as your audio device, create a new channel in your DAW and you're ready to record.
Input Configuration
- Connect a microphone or line-level source to the rear combi-jack input, or plug a guitar or bass directly into the front-panel JFET Instrument Input for an authentic analogue amp-style response.
- Track two microphones or a microphone and guitar simultaneously.
- Set your level by pressing Smartgain and performing at the level you intend to record, iD2+ sets a clean, optimised gain in seconds, so you can stay in the flow instead of riding a knob.
- If you'd rather set gain manually, Select the input channel and use the Control Wheel on the front panel, it clicks into place so every setting is precise and repeatable.
- Monitor your performance via the iD Control app, raise the faders of the channels you’re using to monitor with near-zero latency.
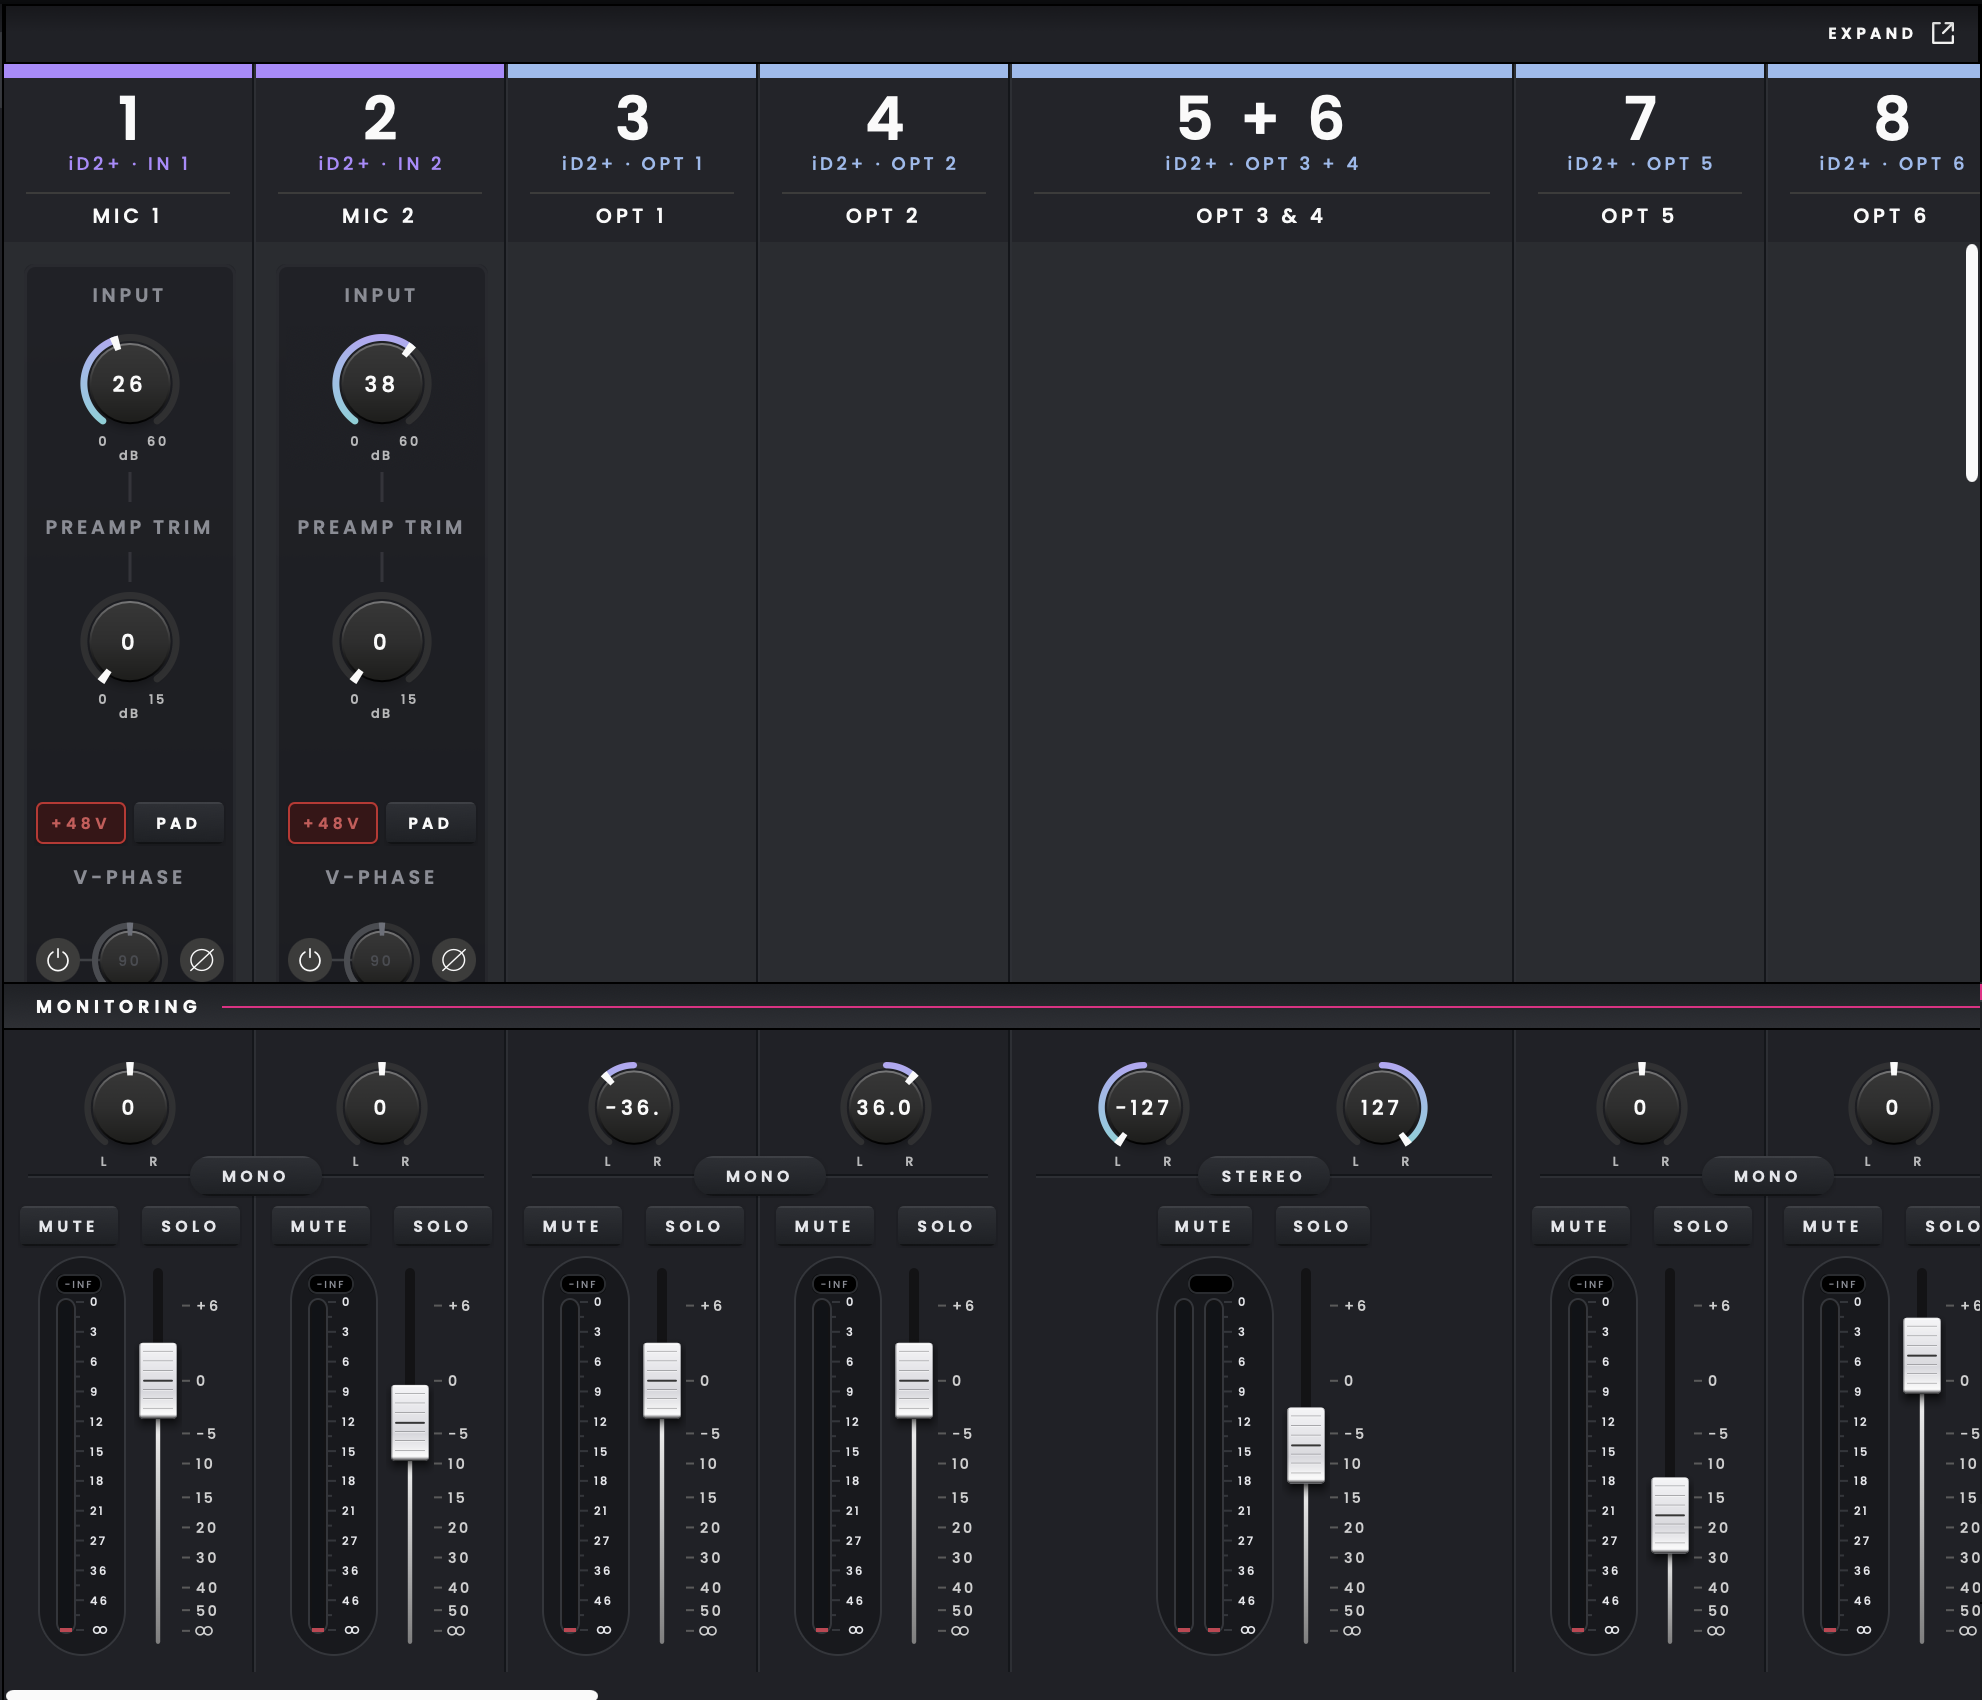
The Audient Console Mic Preamp offers 75dB of clean gain — enough headroom to drive an SM7B without a separate booster.